Maintaining your oral hygiene and health is of utmost importance when wearing braces. Especially when brackets and wires are in the way, flossing—or using wax-covered thread to clean in between teeth—scrapes the difficult-to-reach areas that brushes are prone to miss. Once a day, floss between each tooth, and use a little interproximal brush to clean beneath the wires and around the brackets.
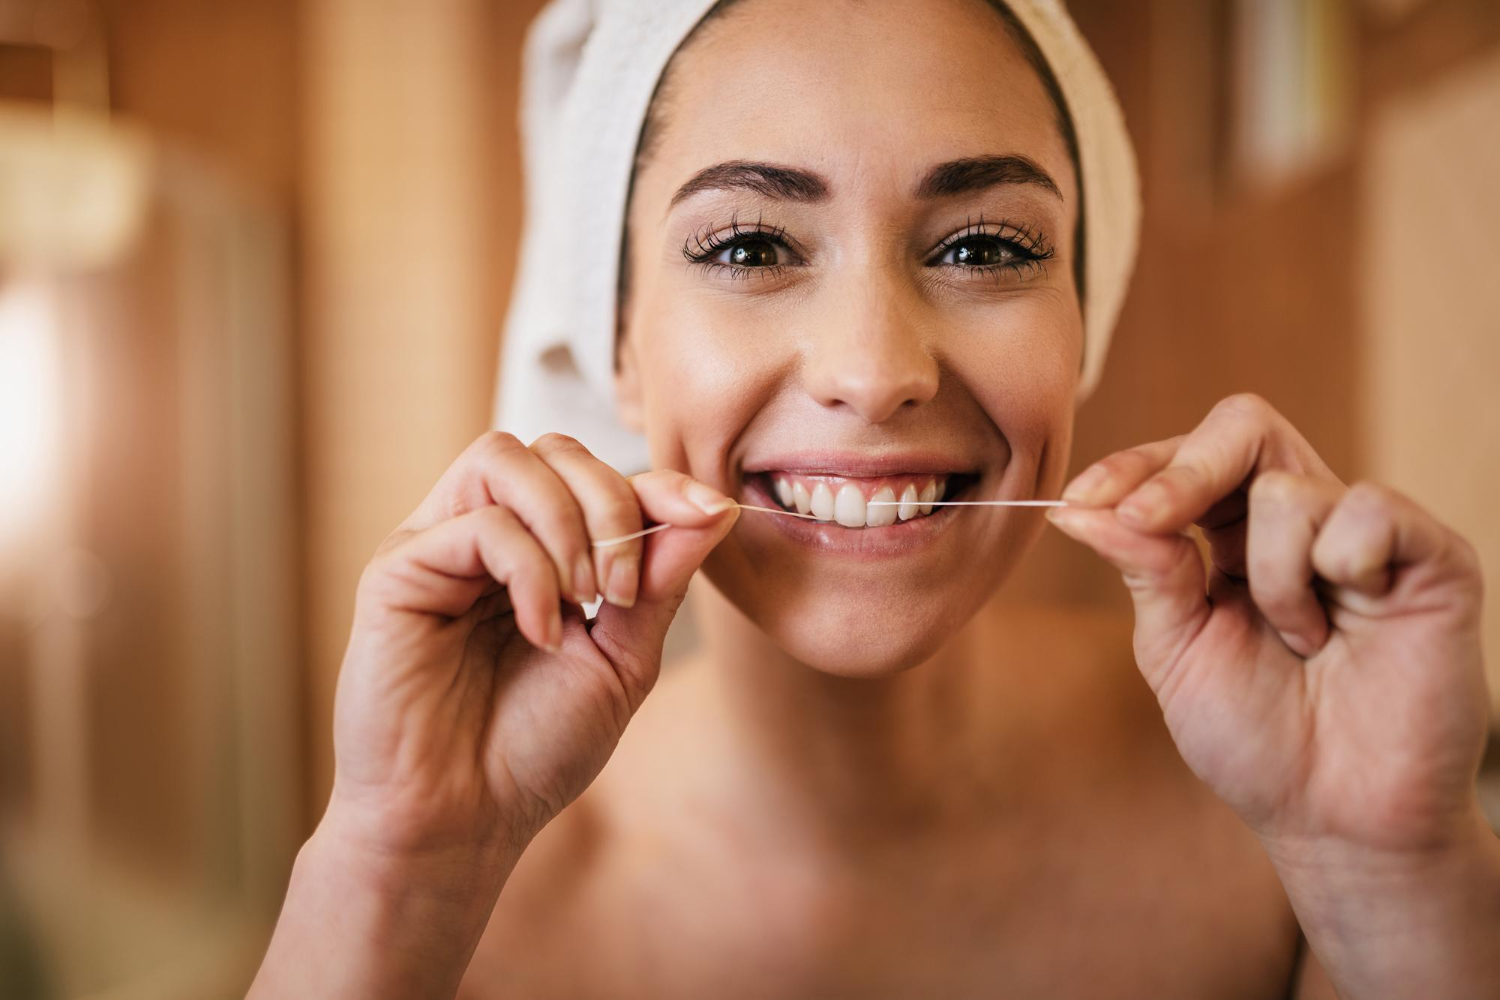
Traditional flossing
Traditional flossing may seem like a simple concept, but when you have braces, it requires a little extra finesse. The basic idea remains the same – using a piece of floss to remove plaque and food particles from between your teeth – but maneuvering around those brackets and wires can be tricky.
To begin traditional flossing with braces, cut off a piece of floss about 18 inches long. This might sound overkill, but trust me, you’ll need the extra length! Gently thread one end of the floss under the wire of your braces and pull it through until you have an equal amount on each side.
Now comes the delicate part: carefully guide the floss between two adjacent teeth and slide it up and down in a gentle sawing motion. Be sure to go down to your gumline without snapping or forcing it. Once you’ve finished cleaning between those two teeth, move on to the next pair.
Remember not to rush this process – take your time and be thorough. Move along each tooth systematically until you’ve cleaned every crevice in your mouth (yes, even those hard-to-reach molars!). And don’t forget about reaching behind those back teeth, too!
Traditional flossing with braces can require some patience and practice, but it will become second nature once you get into a routine. Your orthodontist or dental hygienist can provide additional guidance if needed. So keep up with this essential oral hygiene habit for healthy gums and a dazzling smile throughout your orthodontic journey.
How to use traditional floss with braces
Traditional flossing may seem a bit challenging when maintaining oral hygiene with braces. However, following the correct technique and using the proper tools can effectively clean your teeth and braces.
To use traditional floss with braces:
- Start by threading the floss carefully under the wire of your braces.
- Gently move the floss up and down between each tooth, making sure to go beneath the gumline as well.
- Remember to be extra cautious while maneuvering around any brackets or wires to avoid causing any discomfort or damage.
Taking your time and being thorough when flossing with braces is essential. Please don’t rush through this step; it prevents plaque buildup and maintains healthy gums.
If you find reaching certain areas with regular floss difficult, consider using an orthodontic-specific product such as waxed dental tape or a floss threader. These tools can help you quickly navigate brackets for a more effective cleaning experience.
Waterpik or oral irrigator
Waterpik or oral irrigator, as the name suggests, is a device that uses a stream of water to clean between your teeth and around your braces. It’s an excellent alternative to traditional flossing, especially for those with braces who may find it challenging to maneuver regular dental floss.
Using a Waterpik is relatively simple. Start by filling the reservoir with warm water and attaching the appropriate tip. Position the information at a 90-degree angle against your gumline and turn on the device. Move from tooth to tooth, allowing the pulsating water jet to remove plaque and debris from hard-to-reach areas.
One advantage of using a Waterpik is that it can easily reach places that traditional floss cannot access. The gentle yet powerful stream can flush food particles stuck in brackets or wires.
However, while using a Waterpik may be more comfortable than regular flossing for some people with braces, it doesn’t replace brushing altogether. Continually brushing twice daily with fluoride toothpaste is essential for optimal oral health care.
Incorporating a Waterpik into your oral hygiene routine can enhance your overall dental care experience when you have braces. Remember to follow proper instructions provided by both your orthodontist and the device manufacturer you choose.
How to floss with a Waterpik
Using a Waterpik can be a game-changer when flossing with braces. This handy device uses water pressure to remove food particles and plaque from hard-to-reach areas. Here’s how you can effectively use a Waterpik for your orthodontic care.
First, fill the reservoir of your Waterpik with warm water. You can also add an antimicrobial rinse or mouthwash for added freshness. Adjust the pressure settings according to your comfort level – start low and gradually increase as needed.
Next, place the tip of the Waterpik at a 90-degree angle against your teeth and gums. Aim for the spaces between your teeth and around each bracket.
Please turn on the device and let the pulsating water do its magic! Move along your gumline, hitting all areas around each tooth and bracket.
Take your time using the Waterpik, allowing it to clean each tooth surface thoroughly. As you move from one area to another, bend over slightly so that any excess water flows out of your mouth into the sink.
Remember that using a Waterpik is not meant to replace regular brushing or traditional flossing but rather complementing them in maintaining oral hygiene during orthodontic treatment.
Floss threader
Flossing with braces can be a bit challenging, but fear not! There are tools available to make the process easier and more effective. One such tool is the floss threader. So, what exactly is a floss threader? It’s a tiny device that helps you maneuver dental floss under your wires and between your teeth.
Using a floss threader may seem intimidating initially, but trust me, it’s simpler than it looks. Here’s how you can use one to clean those hard-to-reach spaces effectively:
1. Start by cutting about 18 inches of dental floss and threading one end through the loop of the floss threader.
2. Carefully guide the pointed tip of the threader under your orthodontic wire until it comes out on the other side.
3. Once you have threaded the floss under your wire, hold both ends of the dental floss with your fingers and gently slide it up and down between each tooth.
4. curve the floss around each tooth in a C-shape motion to ensure thorough cleaning.
Using a floss threader will become second nature to you with regular practice! It may take some extra time compared to traditional brushing and flossing methods, but trust me when I say that investing this time will pay off in maintaining excellent oral health throughout your orthodontic treatment journey.
How to use a floss threader to floss with braces
- Using a floss threader can be an effective method for flossing with braces. This handy tool allows you to maneuver the floss easily around the brackets and wires, ensuring a thorough clean.
- To begin, start by threading the floss through the loop of the threader. Make sure to use about 18 inches of floss for each cleaning session. Once incorporated, gently guide the pointed end of the threader under your archwire between two teeth.
- Once in position, pull the threader through until it brings the floss underneath your archwire. Now, you have successfully positioned the floss between two teeth! Wrap one end of the floss around one finger on each hand to remove plaque and debris effectively.
- Now that you have secured both ends of your dental floss, carefully glide it along each tooth’s surface. Be gentle yet thorough to avoid damaging orthodontic appliances or irritating your gums.
Dental tape
Dental tape is another effective tool for flossing with braces. It is similar to traditional floss but is broader and flatter, making maneuvering around brackets and wires easier. The wider surface area of dental tape allows for better plaque removal while being gentle on your gums.
Cut a piece about 18 inches long to use dental tape with braces. Thread one end under the wire of your braces and hold onto both ends of the video. Gently glide the video between two teeth, moving it up and down in a sawing motion. Be sure to clean along the gumline as well.
When you are done cleaning between two teeth, release one end of the tape from under the wire and move on to the next pair of teeth. Repeat this process until you have cleaned between all of your teeth.
Remember to be patient when using dental tape with braces, as it may take some time to get used to threading it under the wires. With practice, however, you will become more proficient at flossing effectively with dental tape.
In addition to using dental tape or other tools designed explicitly for flossing with braces, some general tips and tricks can help make your flossing routine easier and more efficient.
General information and tricks for flossing with braces
Flossing with braces can be tricky, but with the proper techniques and tools, you can maintain good oral hygiene throughout your orthodontic treatment. Here are some general tips and tricks to make flossing with braces more accessible and more effective:
1. Be patient: Flossing with braces may take longer than usual, so don’t rush through it. Take your time to ensure that you clean between each tooth thoroughly.
2. Use waxed floss or dental tape: Regular floss may get stuck in your brackets or wires, causing frustration and potential damage to your braces. Opt for waxed floss or dental tape, as they slide more easily between teeth without getting caught.
3. Find the proper technique: Experiment with different approaches to find the best. Some people prefer starting from the top down, while others find it easier to start at one side of their mouth and work their way around.
4. Be gentle yet thorough: Use gentle pressure when sliding the floss between your teeth to avoid damaging the wires or brackets of your braces. However, ensure you’re still thorough by moving the floss up and down along the surface of each tooth.
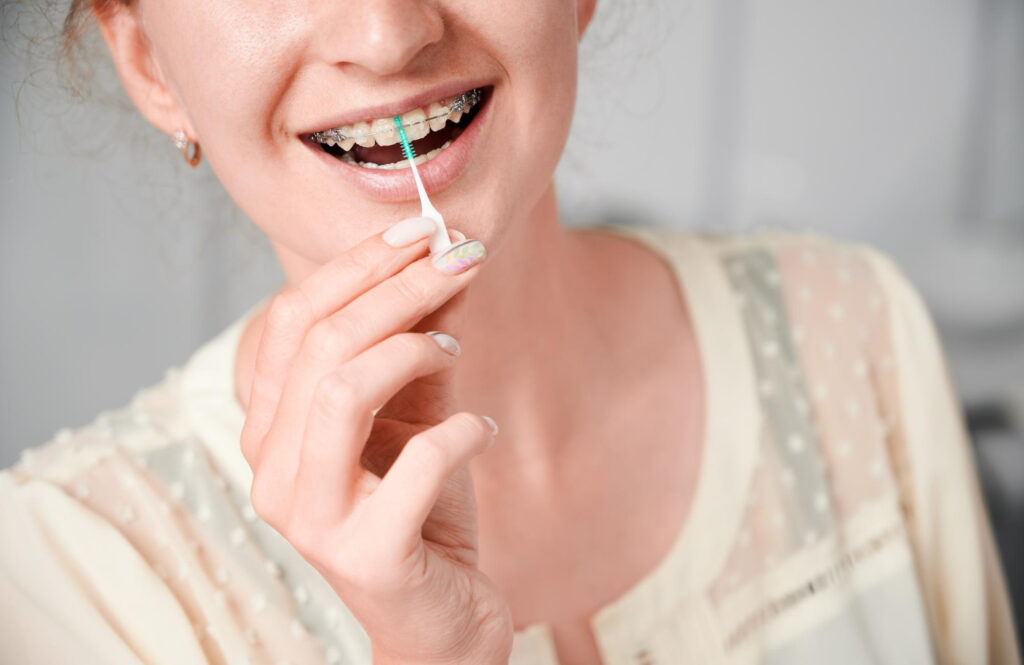
5. Don’t forget about interdental brushes: Interdental brushes are small brushes explicitly designed for cleaning between teeth and around orthodontic appliances like braces. They can be accommodating in removing food particles or plaque that regular brushing may miss.
6. Rinse after flossing: Rinse your mouth thoroughly with water or an antimicrobial mouthwash to remove any loosened debris or bacteria.
7. Consider using a Waterpik: A Waterpik is an oral irrigator that effectively uses water to clean between teeth and along gumlines.
While it shouldn’t replace traditional brushing or flossing entirely, it can be helpful to your oral hygiene routine, especially when dealing with it.